


Tutorial Resources
- Icons: WooFunction by Adii Rockstar (WooThemes)
- Texture: Brown Paper Texture by Six Revisions
Preparation
Before we begin creating the web layout, download the 960 Grid System and unzip the archived file. We will use this grid system to organize and arrange the different components of our web layout. After you unzip the file, go to the templates folder and then go to the photoshop folder. You will find 3 .psd files in there. Each of these files contains a grid with 12, 16 and 24 columns. We will be using the 24-column .psd file. Go ahead and open that up in Photoshop now.Also, the .psd files already have Photoshop guides set up, which will be very useful to us and will save us a bit of time. To show the guides, go to View > Show > Guides, or use the keyboard shortcut: Ctrl/Cmd + ;.
During this tutorial, you will need to create shapes with specific dimensions. To see the exact size of a shape or selection while you are creating it, we need to have the Info Panel up; toggle its visibility by going to Window > Info. Now we’re ready to start creating the web layout!
Step 1: Setting Up the Photoshop Document
For this web layout, we will use the 24-column grid. I prefer this one because it gives me more freedom. Make sure that you have the "960_grid_24_col.psd" file open in Photoshop.Then go to Image > Canvas Size and set the width to 1200px and the height to 1400px (we will give ourselves some room on the sides so we can see our background better).

Step 2: Creating the Header
Hold down the Alt/Option key and click on the Create a new layer group icon from the bottom of the Layers Panel. A new window will appear. Name your group "header" and click OK. Select the Rectangle Tool (U) and create a rectangle with a width of 1200px and a height of 80px, using the color #3b3c48. Name this layer "header bg".
Step 3: Adding the Name of the Web Application
Select the Horizontal Type Tool (T) and write the name for your web application on the left side of the header. Activate the guides to help you align your text. I used the font Myriad Pro Bold Italic and the color #c0ccd0. Below are the character settings (Window > Character) for my text. Double-click on the text layer to open the Layer Style window and use the settings from the following image.Step 4: Creating the Navigation Area
Select the Horizontal Type Tool (T) and write the name for your navigation menu items. I used the font Myriad Pro Regular and the color #c0ccd0. Add a shadow to these layers using the settings from the following image.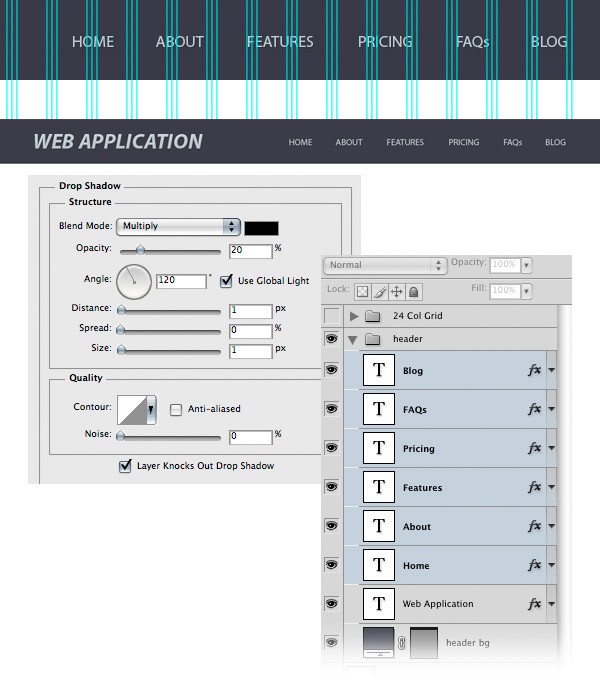
Step 5: Creating the Featured Area
Create a new layer group and name it "featured". Then select the Rectangle Tool (U) and create a rectangle with the height 300px and the color #c0ccd0. Name this layer "featured area bg", double-click on it to open the Layer Style window and use the settings from the following image for Gradient Overlay.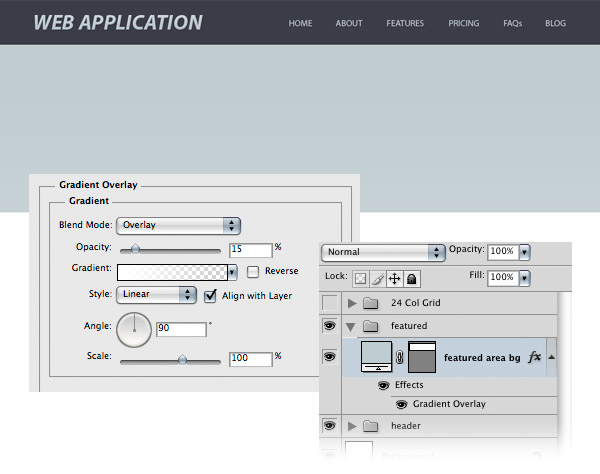
Step 6: Adding a Subtle Texture to the Featured Area
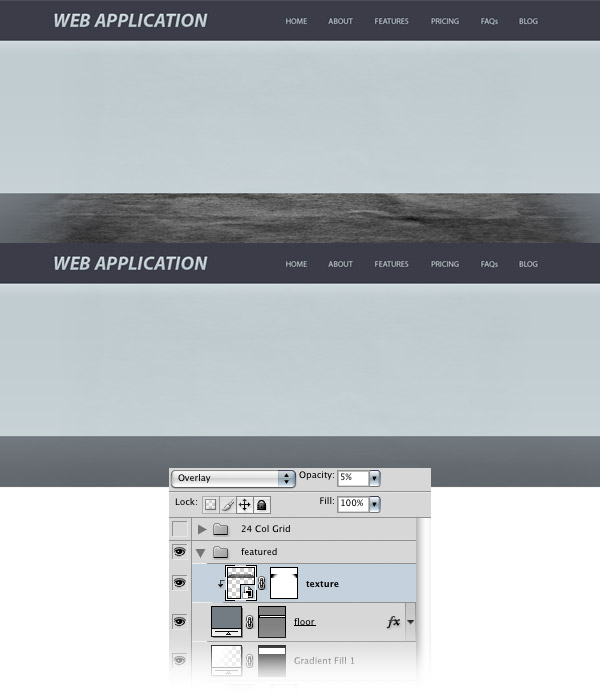
Download this texture and open it in Photoshop. Then go to Layer > New Adjustment Layer > Black & White and use the settings from the following image. Select the two layers, right-click on one of them, and then select Covert to Smart Object. Name this new layer "texture".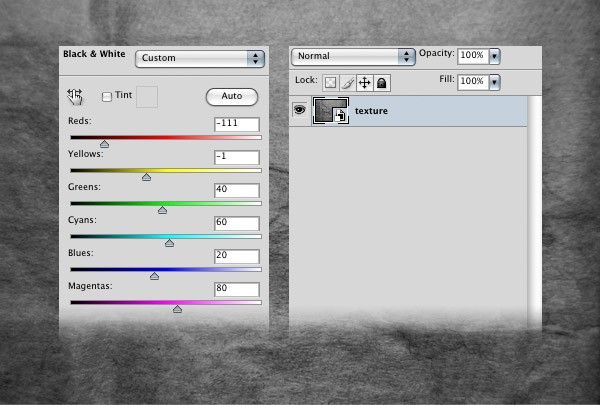
Use the Move Tool (V) to move this layer into your main Photoshop document. We need to put the texture exactly in the middle of the document. In order to do this, select your entire canvas (Ctrl/Cmd + A), switch to the Move Tool (V) and click on the Align horizontal centers button from the Option Bar. Then hit Ctrl/Cmd + D to deselect. To make the texture appear only over the featured area, right-click on the texture layer and choose Create Clipping Mask.

Click on the Add layer mask button from the bottom of the Layers Panel. Then choose the Gradient Tool (G), set it to a black-to-transparent gradient, hold down Shift, and then drag a horizontal gradient at the left side of the texture and another one on the right side (refer to the image below for reference).
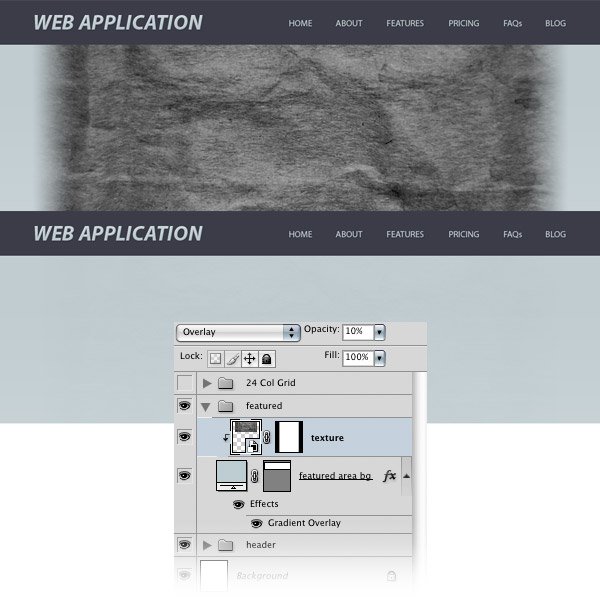
Then set the Blend Mode of this layer to Overlay and reduce its Opacity to 10%.
Step 7: Adding a Gradient at the Top of the Featured Area
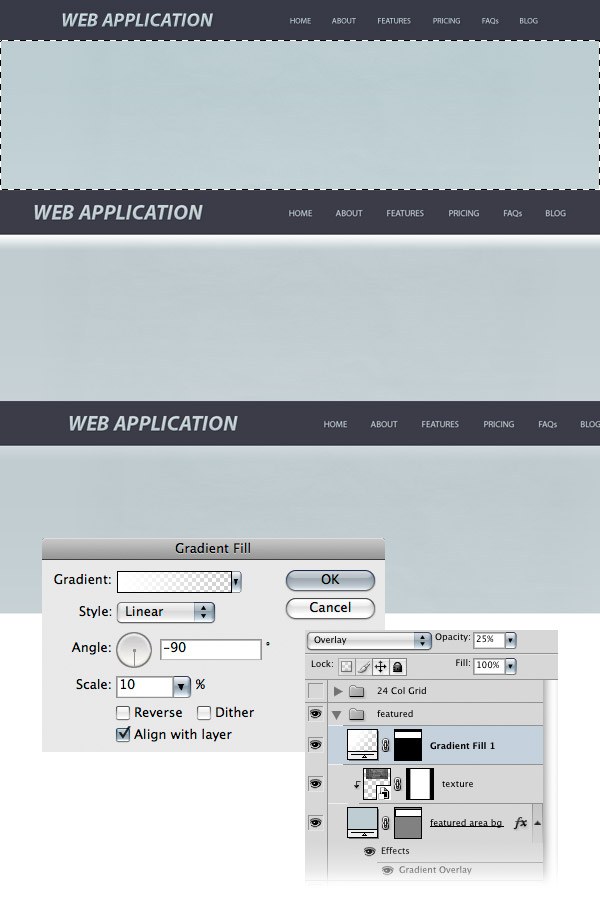
Hold down the Ctrl/Cmd button and click on the vector mask of the "featured area bg" layer to select it. Then go to Layer > New Fill Layer > Gradient and use the settings from the image shown below. While the Gradient Fill window is opened, click on your canvas and move the white gradient at the top of the blue rectangle.Notice that the selection of the blue rectangle that you made earlier has been used as a mask for this gradient fill layer. Set the Blend Mode of this layer to Overlay, and reduce its Opacity to 25%.
Step 8: Add Another Background for the Featured Area
Select the Rectangle Tool (U) and create a rectangle with the height of 100px and the color at #747b81, right underneath the first one. Name this layer "floor", double-click on it, and then use the settings shown on the following image. Later, when we’ll add the buttons and the featured image, we will create shadows for them on this "floor" layer.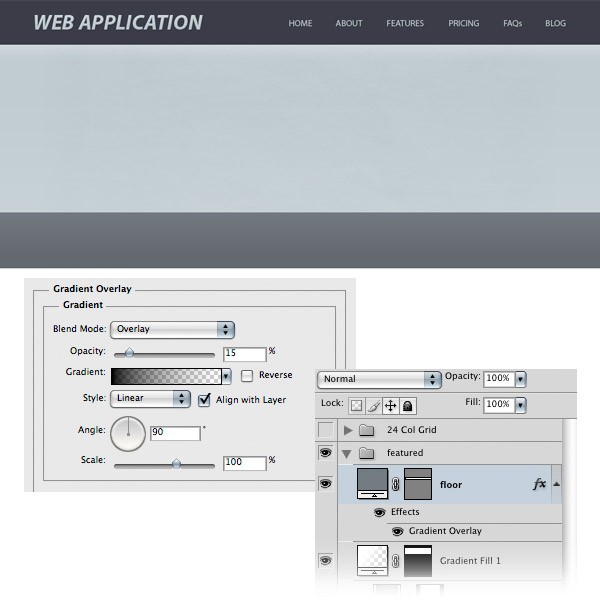
Step 9: Adding a Texture to the Floor
Hold down Alt/Option, click on the "texture" layer and drag a copy of it above the "floor" layer. Right-click on the mask of this layer and select Delete Layer Mask. Right-click on this layer and choose Create Clipping Mask to make it visible only inside the "floor" layer.Go to Edit > Transform > Perspective, hold down the Shift key and drag the upper-left transform control to the right. With the Shift key still pressed down, click on the bottom-left corner and drag it to the left. When you’re done, just hit Enter. We added this perspective to the texture to make the rectangle look like it’s a floor.
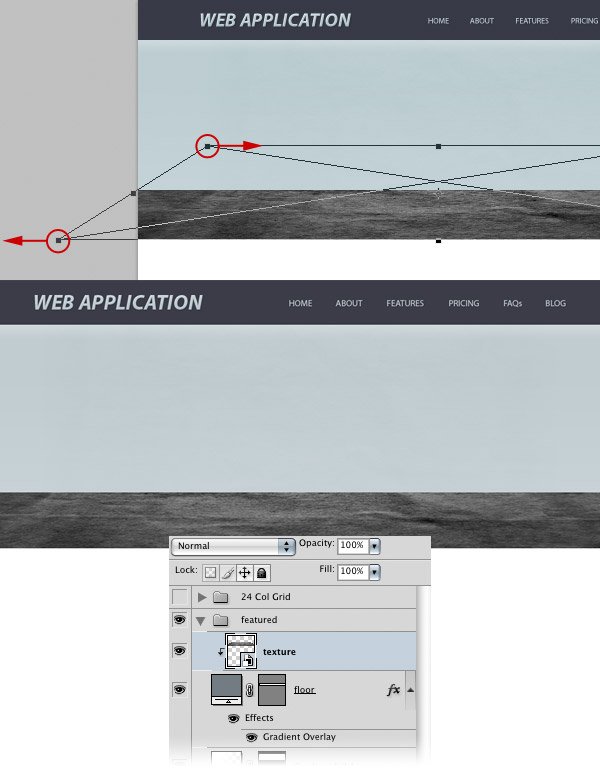
Step 10: Masking the Texture
Add a mask to the "texture" layer by clicking on the Add layer mask button from the bottom of the Layers Panel. Then hold down the Ctrl/Cmd key and click on the vector mask of the "floor" layer to select the rectangle.Create a black-to-transparent gradient using the Gradient Tool (G) on the left side of the texture and one on the right side. This will make the texture gradually fade away. Hit Ctrl/Cmd + D to deselect. Take a look at the image below for reference. Set the Blend Mode of this layer to Overlay and reduce its Opacity to 5%.
Step 11: Add Noise to the Floor Layer
Create a new layer and fill it with white using the Paint Bucket Tool (G). Right-click on it and choose Create Clipping Mask to make it visible only inside the dark rectangle. Right-click (again) on this layer and select Convert to Smart Object. Then go to Filter > Noise > Add Noise and use the settings from the following image. Name this layer "noise", set its Blend Mode to Multiply, and reduce its Opacity to 20%.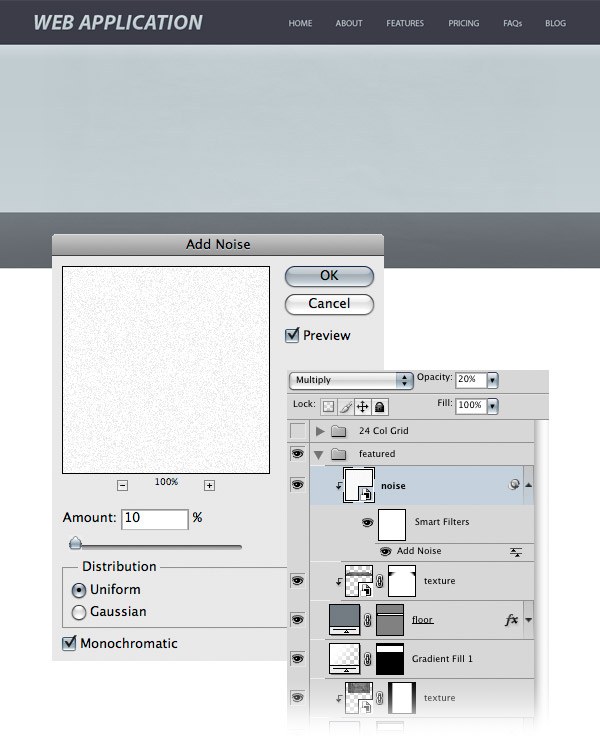
Step 12: Creating Some Thin Lines
Now we will create 2 lines with the weight of 1px at the top. At the bottom of the line will be a light blue rectangle that will give the layout a more elegant look.Select the Line Tool (U), set Weight to 1px, hold down the Shift key to ensure you’re drawing a straight line, and then create a horizontal line underneath the header using the color #969da0. Leave a distance of 2px between the header and this line. Name this layer "1px line".
Hit Ctrl/Cmd + J to duplicate this layer and, using the Move Tool (V), move it at the bottom of the light blue rectangle. Leave a distance of 2px between this line and the dark rectangle.
Step 13: Adding the Featured Content
Activate the guides by hitting Ctrl/Cmd + ;. Select the Horizontal Type Tool (T) and create a text box with the width of 430px (11 pink columns in the 24-column 960 Grid System). Then add some text inside this box. I used the color #636d70 with the font Myriad Pro Bold for the headline and Helvetica Regular for the block of text.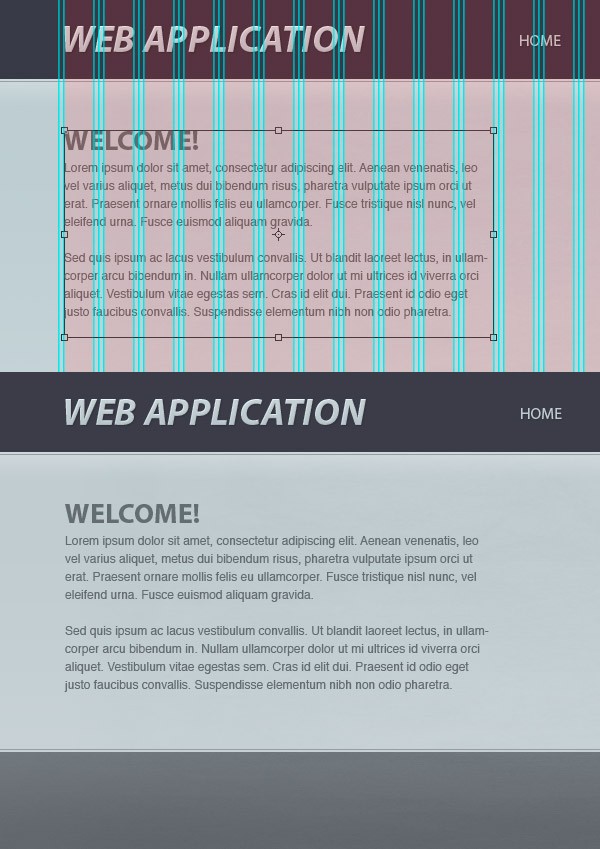
Step 14: Creating Call-to-Action Buttons
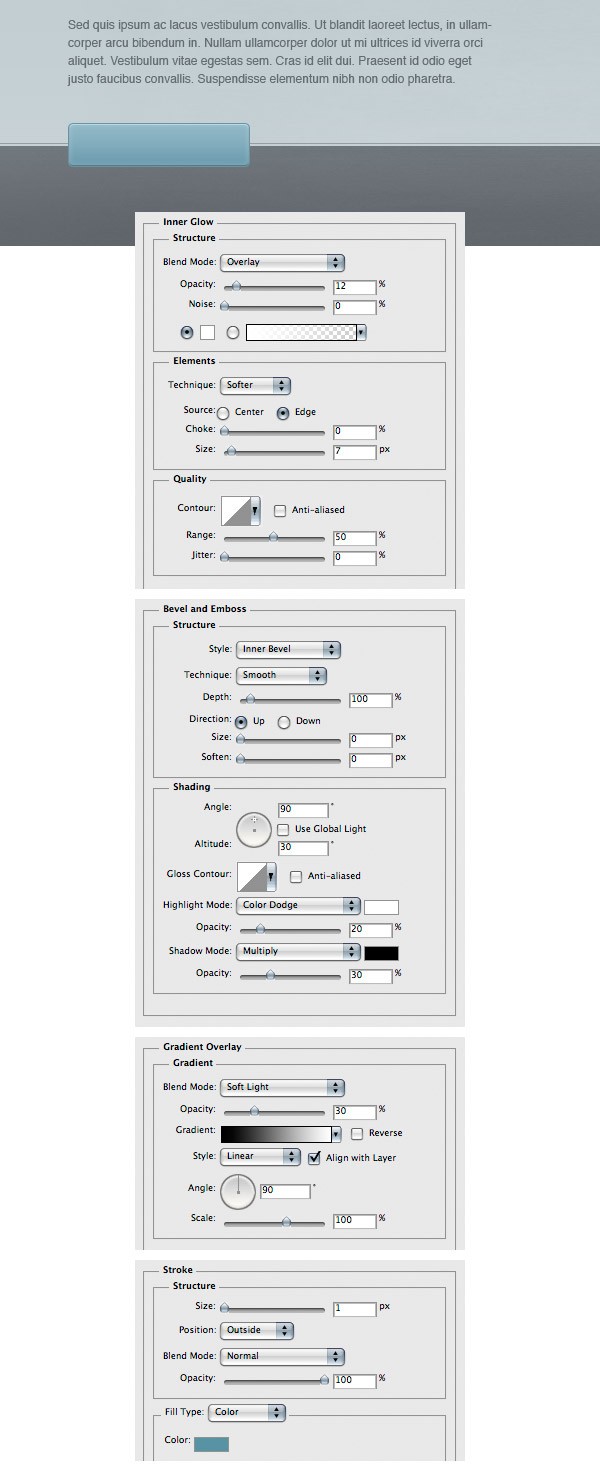
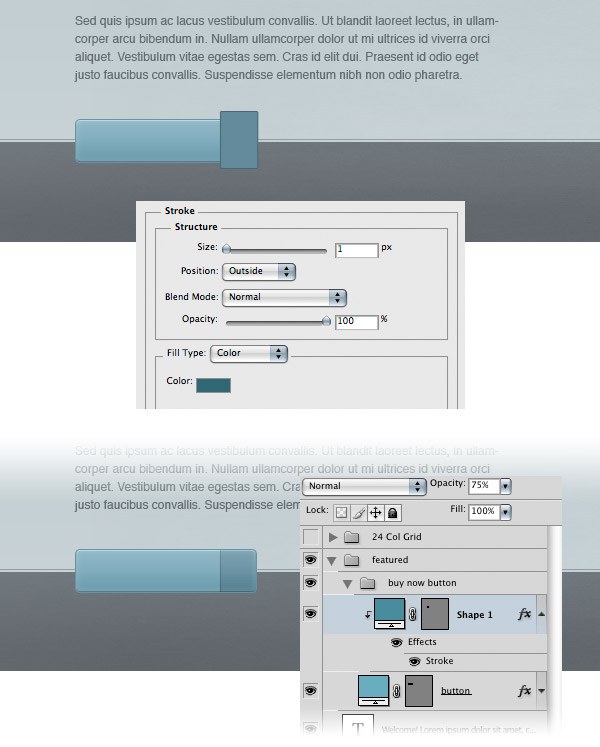
Now we will create a couple of call-to-action buttons: one for buying the application and another one for downloading it. We’ll start with the first one, the "buy now" button.Create a new layer group and name it "buy now button". Select the Rounded Rectangle Tool (U), set the Radius to 4px and create a rounded rectangle with the dimensions 180px by 42px and the color #80acbc. Name this layer "button", double-click on it and use the settings from the image below. For the Stroke layer effect, I used the color #6c92a0.
Select the Rectangle Tool (U) and create a small rectangle over the right area of the button using the color #628b9a. Add a 1px stroke to this rectangle using the color #476873. Right-click on this layer and select Create Clipping Mask to make it visible only inside the button. Set the Opacity of this layer to 75%.
Step 15: Adding Text on the Call-to-Action Buttons
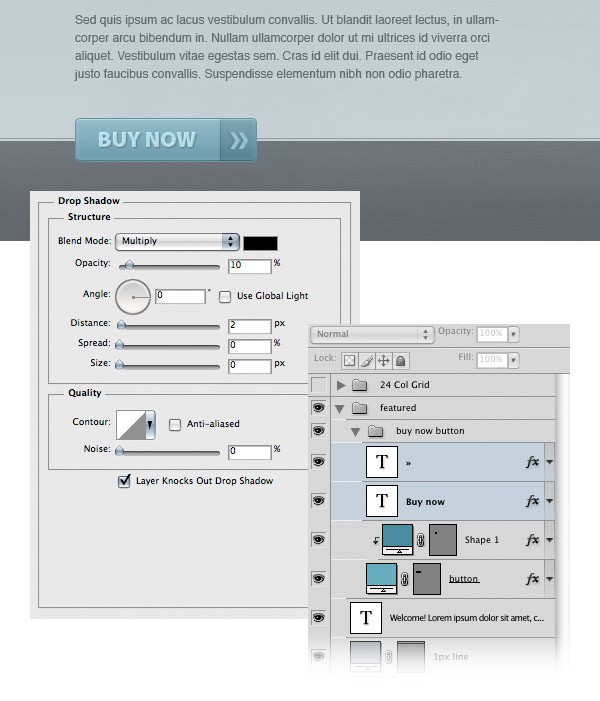
Select the Horizontal Type Tool (T) and write the words "buy now" inside your button. I used the color #b4dcea and the font Myriad Pro Black. Double-click on your text layer to access the Layer Style window and then use the settings from the following image.
Select the Horizontal Type Tool (T) again, type the following character, » (or just copy and paste it – it’s called a right double angle quotes), and place it in the right area of your button using the color #95c1d1 and the size of 44pt. Add a shadow to this layer using the settings from the image below.
Step 16: Creating a Shadow for the Button
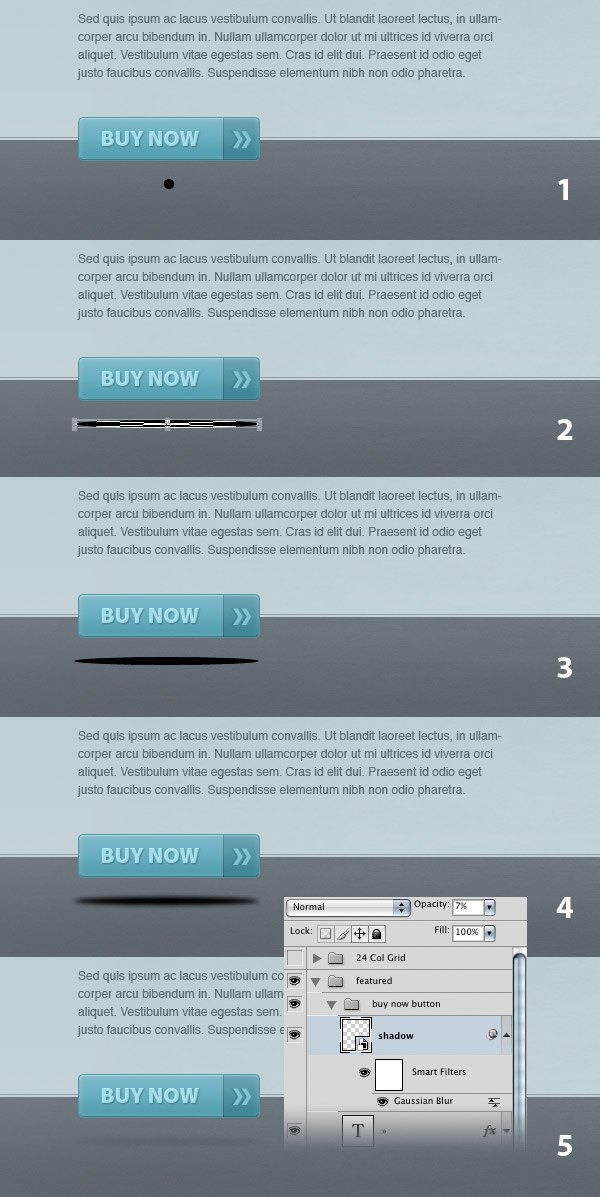
Select the Ellipse Tool (U), hold down the Shift key and create a black circle with the dimensions 10px by 10px (1). Put this circle 20px underneath the button. Right-click on this layer and select Convert to Smart Object. Then go to Edit > Free Transform (Ctrl/Cmd + T), hold down the Alt/Option + Shift keys and stretch the circle by dragging the middle-right transform control to the right (2, 3).Go to Filter > Blur > Gaussian Blur and set the Radius to 2.2 px (4). Name this layer "shadow" and set its Opacity to 7% (5).
Step 17: Create the Download Button
Now create a "download" button just like you created the "buy now" button and then add a shadow to it.
Step 18: Adding the Featured Image
Select the Rounded Rectangle Tool (U) and create a rounded rectangle with the dimensions 470px by 270px. You can activate the guides to help you create this shape. Name this layer "image_holder", double-click on it and use the settings from the following image. For Inner Glow, I used the color #c7d0d3 and for Stroke color, I used #889092.Open any image in Photoshop and move it into your main Photoshop document using the Move Tool (V). Name this layer "image", right-click on it and choose Create Clipping Mask to make it visible only inside the "image_holder" layer. I used the preview image from the How to Make a Sleek Aluminium Hard Drive in Photoshop tutorial and I created a Hue/Saturation adjustment layer to change its color.

Step 19: Add a Shadow for the Featured Image
Create a shadow for the featured image exactly like the one on the "buy now" button at Step 16.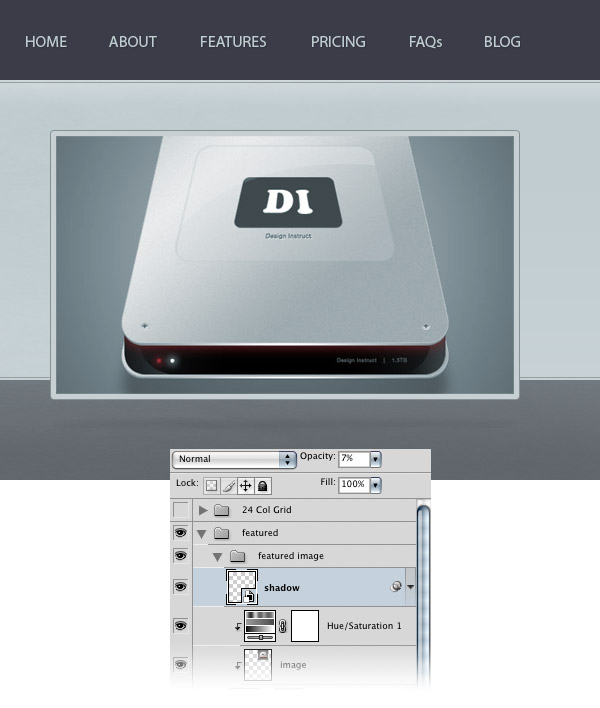
Step 20: Create the "Screenshots" and "About" Areas
Create a new layer group and name it "screenshots & about". Then select the Rectangle Tool (U) and create a rectangle underneath the featured area with the height of 120px and the color #54595d. Name this layer "rectangle", double-click on it and use the settings from the following image for Drop Shadow and Gradient Overlay.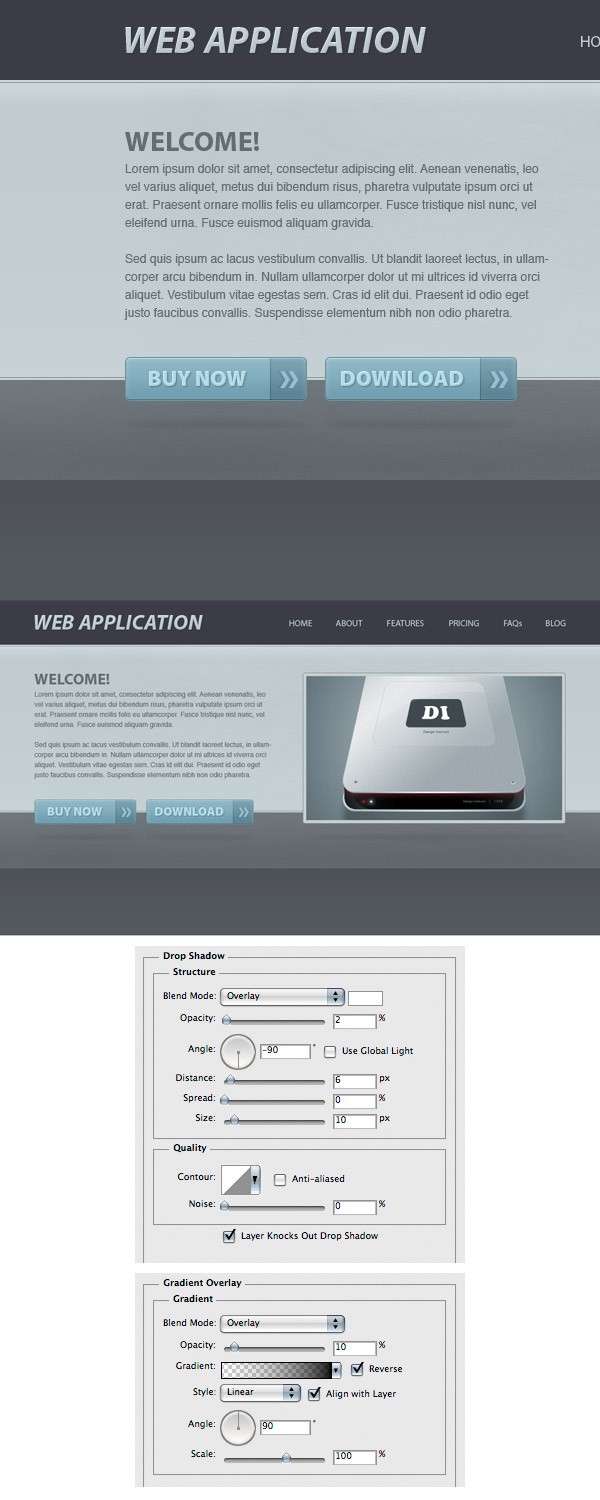
Select the Line Tool (U), set the Weight to 1px, hold down the Shift key and create a horizontal line at the top of the rectangle you created at the previous step. Use the color #42474a. Then name this layer "1px line".
Hit Ctrl/Cmd + J to duplicate this layer. Select the Move Tool (V) and hit the Down Arrow key to move this new layer 1px down. Change the color of this new line to #5a5f64.
Create 2 more lines at the bottom of the rectangle using the same colors.
Step 21: Create the Content for the "About" Area
Select the Horizontal Type Tool (T) and add the content for the "About" section. Activate the guides to help you position your text. The width of this block of text should be 430px (or 11 pink columns on the "24 Col Grid" layer group). For the headline, I used the font Myriad Pro Bold with the size 22pt and the color #889096. For the body text, I used the font Helvetica Regular with the size 12pt and the color #a6afb6.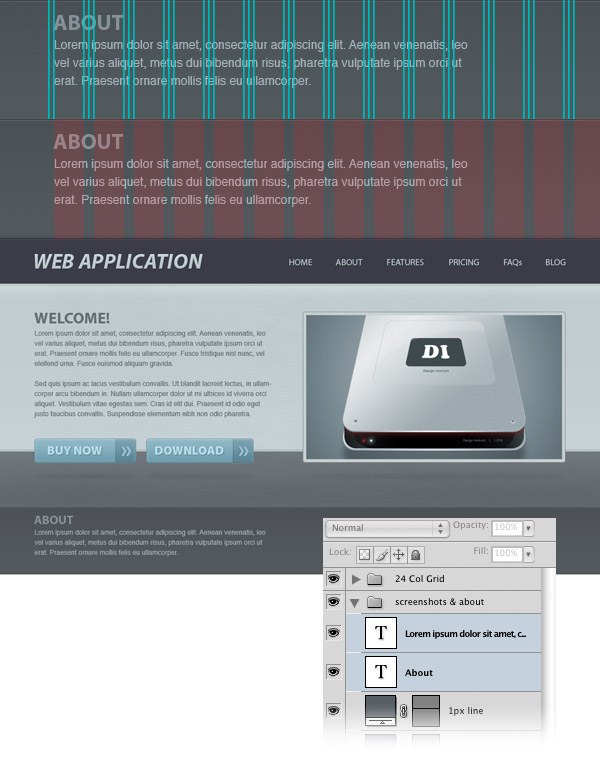
Step 22: Create a "Read More" Button
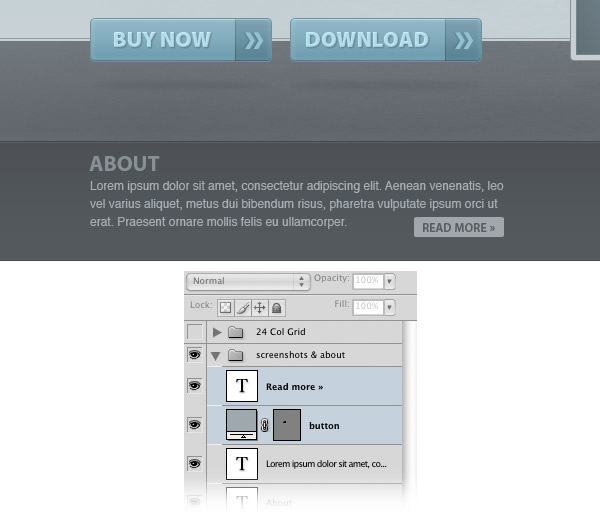
Select the Rounded Rectangle Tool (U), set the Radius to 2px and create a rounded rectangle with the dimensions 90px by 20px and the color #a0a7ac. Name this layer "button" and put it on the bottom-right corner of the "About" area.Select the Horizontal Type Tool (T) and type "Read more »" within your button. I used the font Myriad Pro Semibold, 12pt font size, and the color #5a5e62.
Step 23: Create the "Screenshots" Area
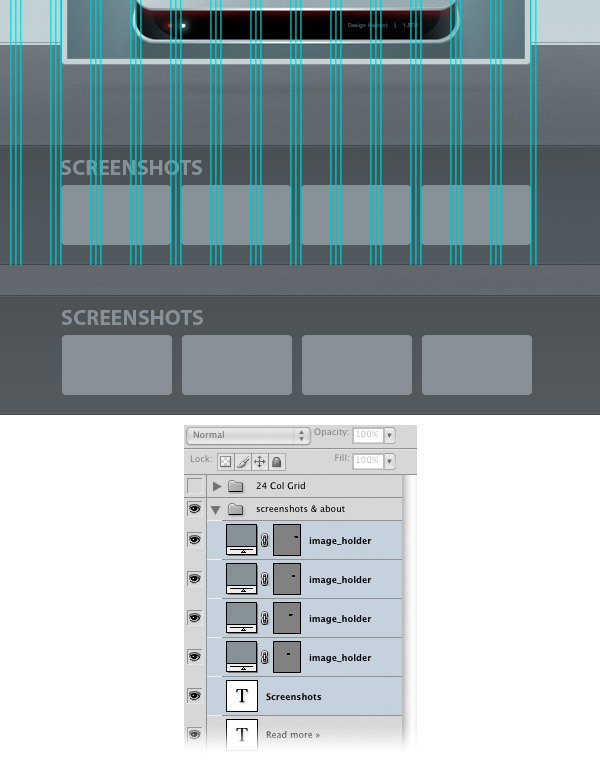
Select the Type Tool (U) and write the word "Screenshots" using the same font and color that you used in the "About" area. Activate the guides and make sure you align this text layer with the featured image from above.Use the Rounded Rectangle Tool (U) with the Radius set to 4px to create a rounded rectangle with the dimensions 110px by 60px. Name this layer "image_holder" and duplicate it 3 times (Ctrl/Cmd + J). Then switch to the Move Tool (V) and arrange all these layers as shown in the image below.
Step 24: Adding Images for the "Screenshots" Area
Open an image in Photoshop and move it into your main Photoshop document using the Move Tool (V). Name this layer "image" and put it above the first "image_holder" layer. Right-click on the image’s layer and select Create Clipping Mask. Now your image is visible only inside the first rounded rectangle. Repeat this step for the other 3 rectangles as well.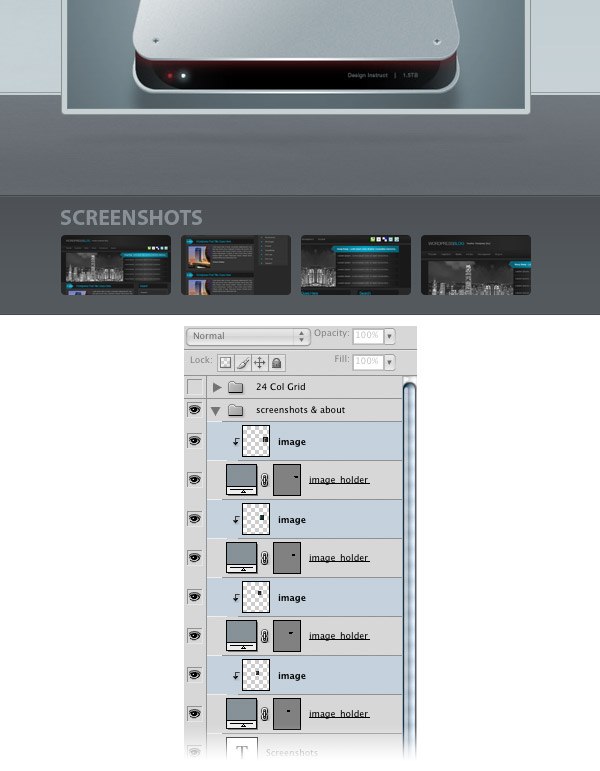
Step 25: Create a Separator
Create a new layer group and name it "separator". Then select the Line Tool (U) and create two vertical lines from the top of the background rectangle to the bottom. For the first line, use the color #5a5f64 and for the second one, #42474a.Click on the "separator" group to make it active. Then add a mask to this group by clicking on the Add layer mask button from the bottom of the Layers Panel. Use the Gradient Tool (G), set it to a black-to-transparent gradient, hold down the Shift key and drag a vertical gradient at the top of the separator. Also create a vertical gradient at the bottom. This will make the separator gradually fade away at the top and at the bottom.

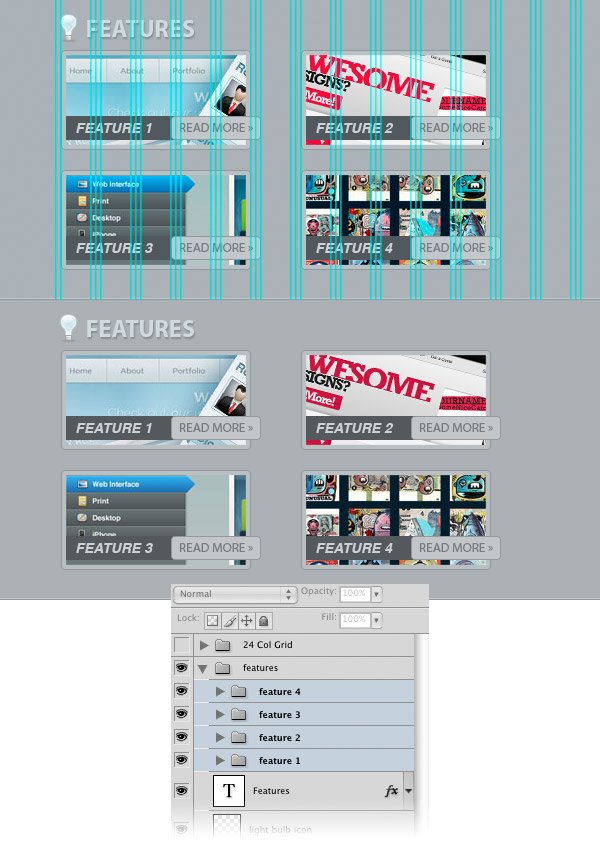
Step 26: Creating the "Features" Area
Create a new layer group and name it "features". Then select the Rectangle Tool (U) and create a rectangle with the height of 300px and the color #abb1b5 underneath the "Screenshots" and "About" areas. Name this layer "bg".Select the Line Tool (U) and create two horizontal lines with the Weight of 1px at the bottom of the rectangle you created. For the first line, use the color #c2c7ca and for the second one, #93999d.

Step 27: Adding an Icon for the "Features" Area
Download this set of icons from WooThemes. Then open the lightbulb icon in Photoshop and put it in the upper-left corner of the "Featured" area. Name this layer "light bulb icon". Activate the guides to help you position the icon.Select the Horizontal Type Tool (T) and write the word "Features" next to the bulb icon. I used the font Myriad Pro Bold with the size 24pt and the color #d1d9df. Double-click on your text layer to open the Layer Style window and use the settings from the image below for Drop Shadow.
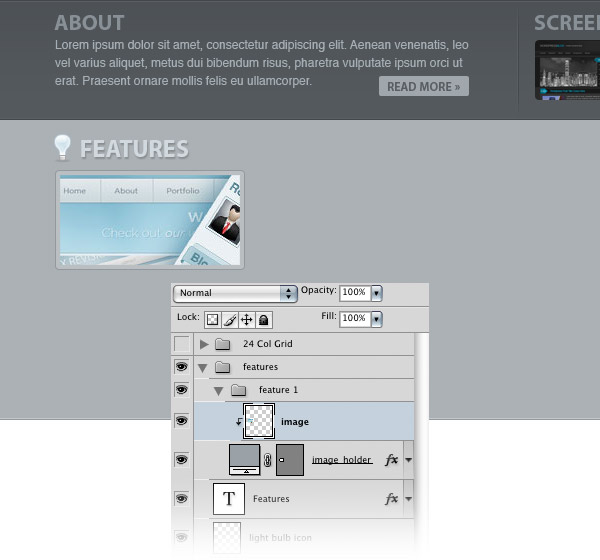
Step 28: Creating the "Features" Boxes
Create a new layer group and name it "feature 1". Then select the Rounded Rectangle Tool (U), set the Radius to 4px and create a rounded rectangle with the dimensions 190px by 100px. Name this layer "image holder", double-click on it and use the settings from the following image. For Inner Glow, I used the color #babfc2 and for Stroke, I used #93989d.
Open an image in Photoshop and move it into your main Photoshop document. Use the Move Tool (V) to move this image over the rectangle you just created. Name this layer "image", right-click on it and select Create Clipping Mask.
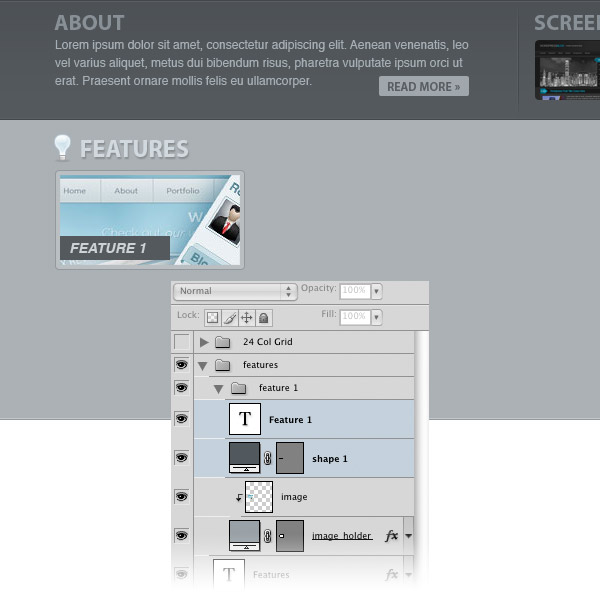
Select the Rectangle Tool (U) and create a rectangle with the dimensions 110px by 24px and the color #54595d in the bottom-left corner of the image from the previous step. Then select the Horizontal Type Tool (T) and type "Feature 1" inside this rectangle. I used the font Helvetica Bold Oblique and the color #cbd2d6.
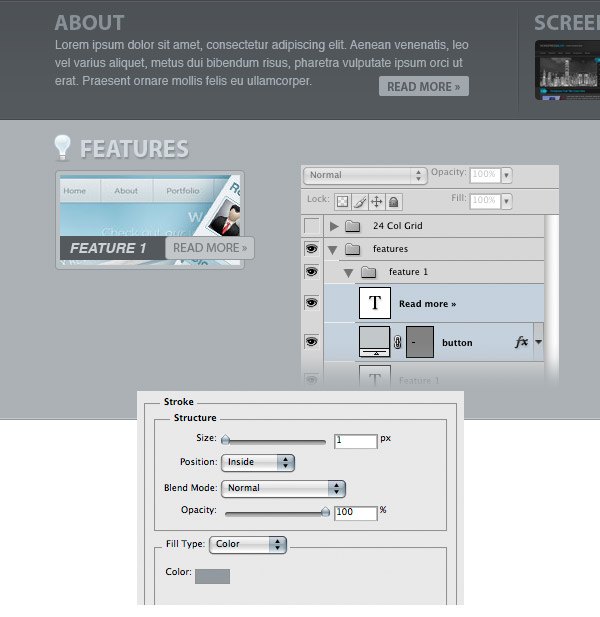
Select the Rounded Rectangle Tool (U), set the Radius to 4px and create a rounded rectangle with the dimensions 90px by 24px and the color #c2c6c8. Name this layer "button", double-click on it to access the Layer Style window, and add a Stroke layer effect (Size: 1px, Position: Inside, Color: #93989d) to make a 1px inside stroke on the button. Select the Horizontal Type Tool (T) and write the words "Read More »" inside the rounded rectangle using the color #777b7f.
Create three more "features" boxes using the same process as above. You can even just duplicate the "feature 1" layer group 3 times, change the images, and then use the Move Tool (V) to position them.
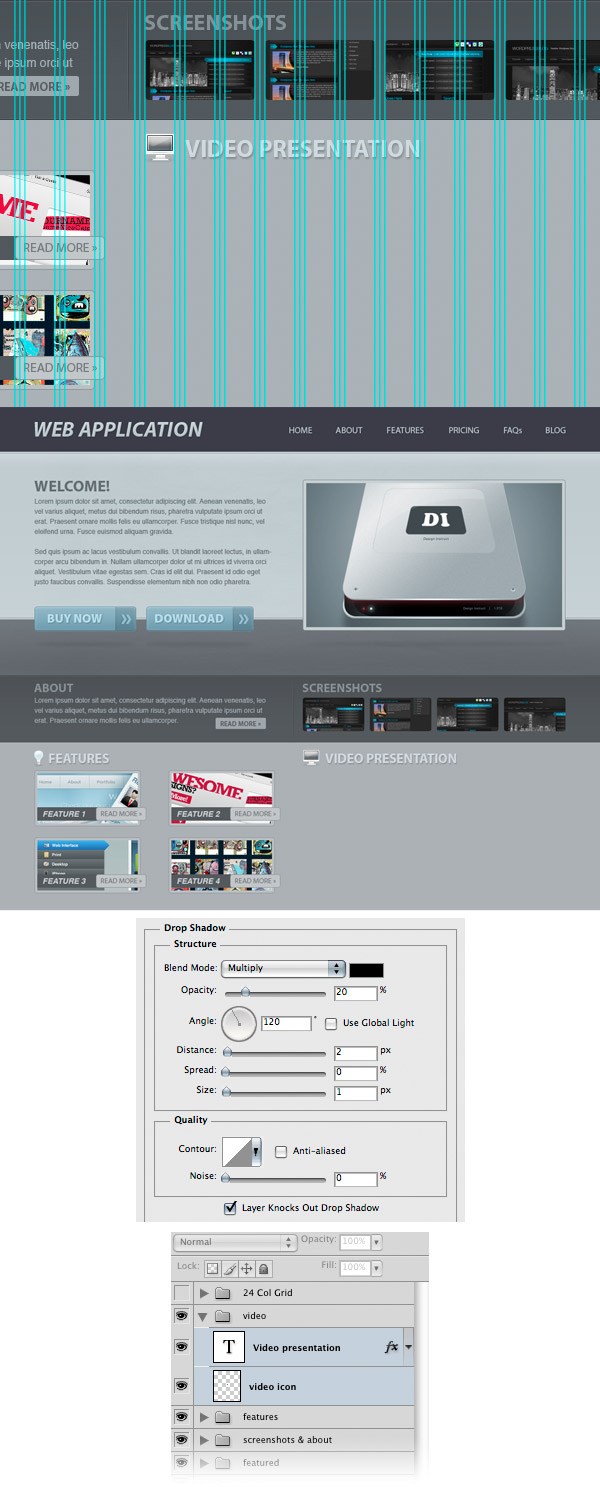
Step 29: Creating the "Video Presentation" Area
Now we are going to create an area for the video presentation of our web application. Create a new layer group and name it "video". Then open the screen icon from the icons set you downloaded earlier and move it into your main Photoshop document. Name this layer "video icon" and make sure it’s aligned with the light bulb icon and with the screenshots from above.Select the Horizontal Type Tool (T) and write the words "Video Presentation" next to the screen icon. I used the font Myriad Pro Bold with the color #d1d9df. Double-click on your text layer and use the settings from the following image for Drop Shadow.
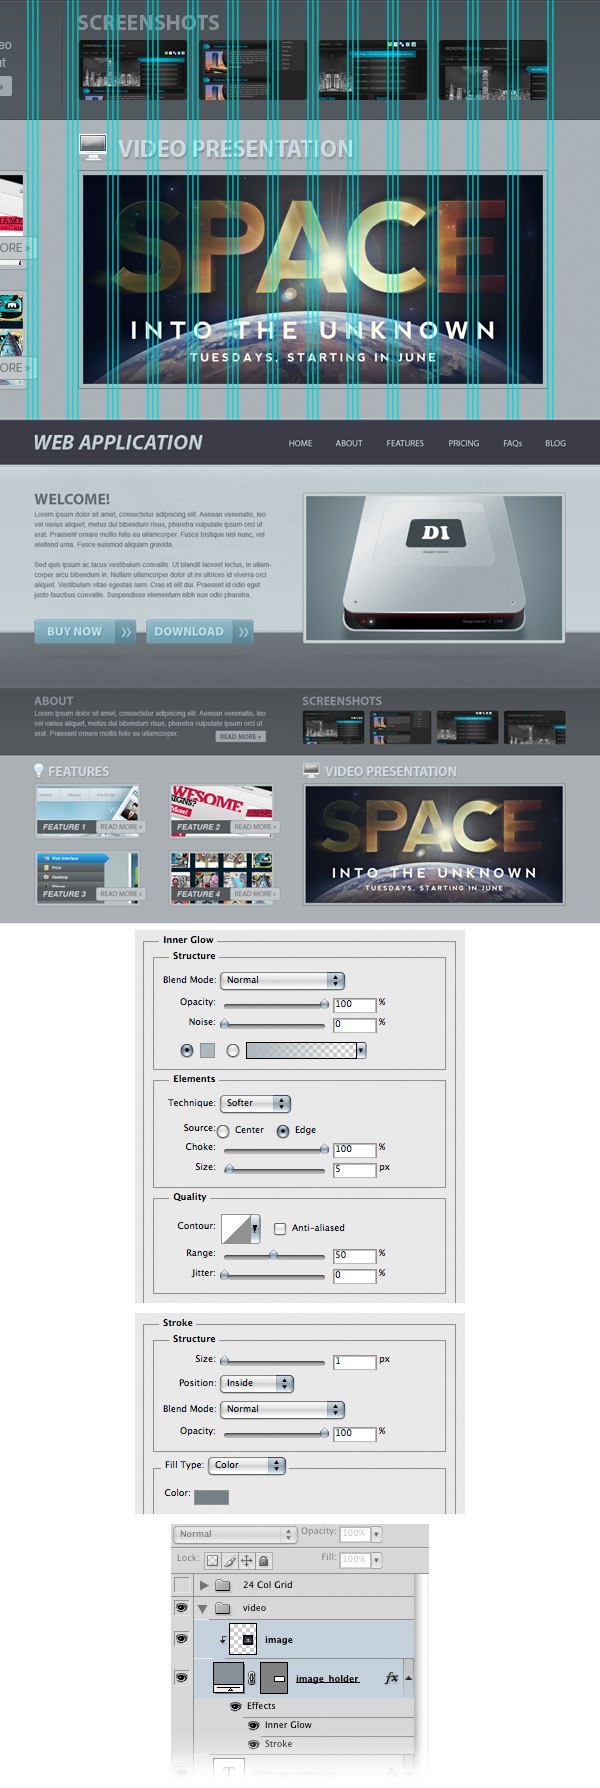
Select the Rectangle Tool (U) and create a rectangle with the dimensions of 470px by 220px. Name this layer "image_holder", double-click on it to open the Layer Style window and use the settings shown in the following image. For Inner Glow, I used the color #afb6bb and for Stroke, #777e84.
Open an image in Photoshop and move it into your main Photoshop document, above the rectangle from the video area. Name this layer "image", right-click on it and select Create Clipping Mask.
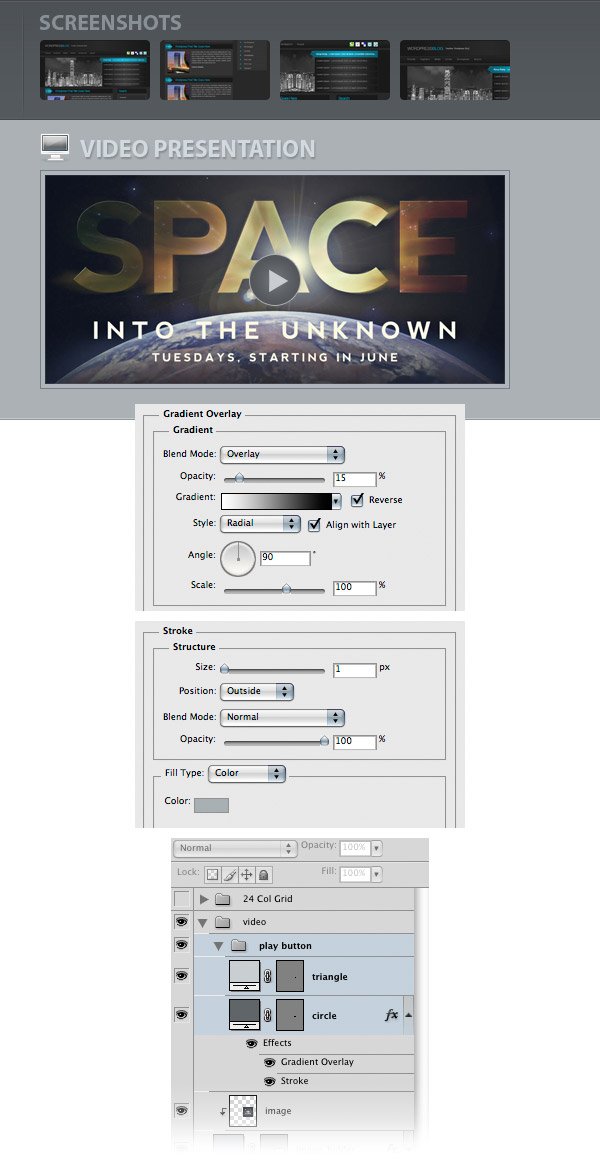
Step 30: Creating the Play Button for the "Video Presentation" Area
Create a new layer group and name it "play button". Then select the Ellipse Tool (U), hold down the Shift key and create a circle with the dimensions 50px by 50px and the color #616569. Name this layer "circle", double-click on it to open the Layer Style window and use the settings from the following image.To put the circle exactly in the middle of the video, follow these steps:
- Hold down the Ctrl/Cmd key and click on the vector mask of the "image_holder" layer to create a selection around it
- Make sure that the "circle" layer is active, and if not, while keeping the selection still active, switch to the "circle" layer by clicking on it in the Layers Panel
- Go to Layer > Align Layers to Selection > Vertical Centers
- Then go to Layer > Align Layers to Selection > Horizontal Centers
- Hit Ctrl/Cmd + D to deselect
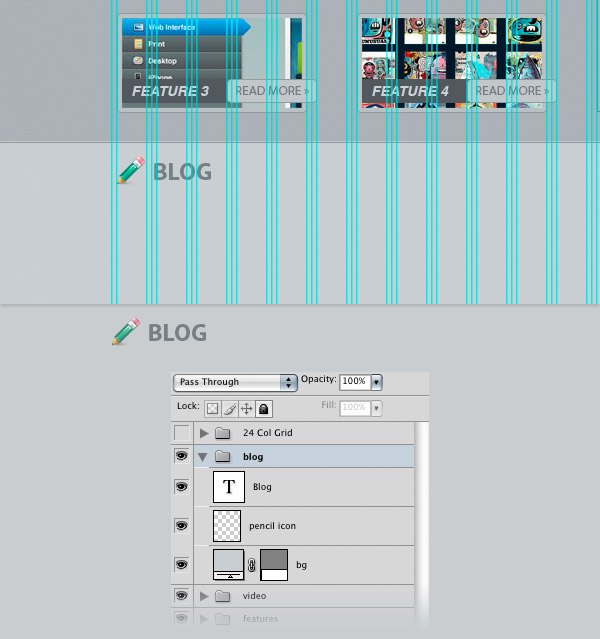
Step 31: Creating the Blog Area
Create a new layer group and name it "blog". Then select the Rectangle Tool (U) and create a rectangle with the height of 500px and the color #c9cdd0 beneath the "features" and "video" areas. Name this layer "bg".Open the pencil icon from the icons set you downloaded in Photoshop, and move it into your main Photoshop document. Activate the guides and put this icon in the left side of the layout.
Select the Horizontal Type Tool (T) and write the word "Blog" next to the icon. I used the font Myriad Pro Bold and the color #777e84.
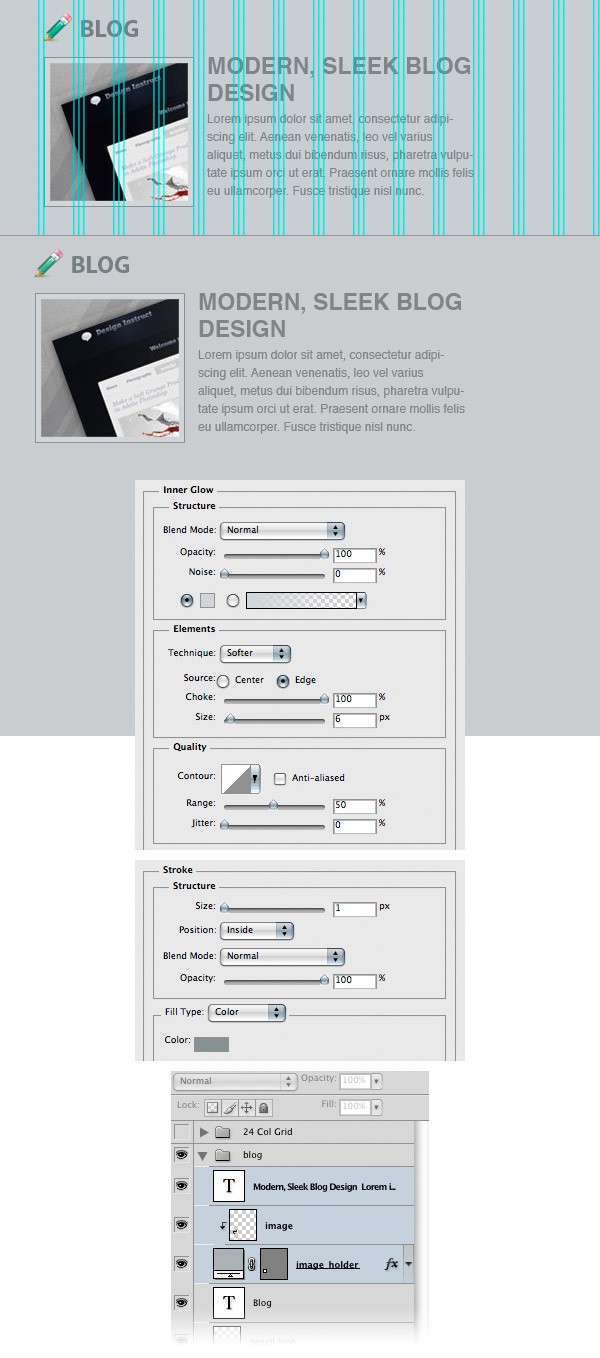
Step 32: Adding a Blog Post
Select the Rectangle Tool (U) and create a square with the dimensions 150px by 150px. Name this layer "image_holder", double-click on it to open the Layer Style window and use the settings from the following image. For Inner Glow, I used the color #d1d5d8 and for Stroke, I used #889092.Open an image in Photoshop and move it into your main Photoshop document. Put this image above the square you created earlier. Then name this layer "image", right-click on it and select Create Clipping Mask.
Select the Horizontal Type Tool (T) and add some content next to the image. I used the font Helvetica (regular) and the color #808487.
Create one more blog post using the same process.

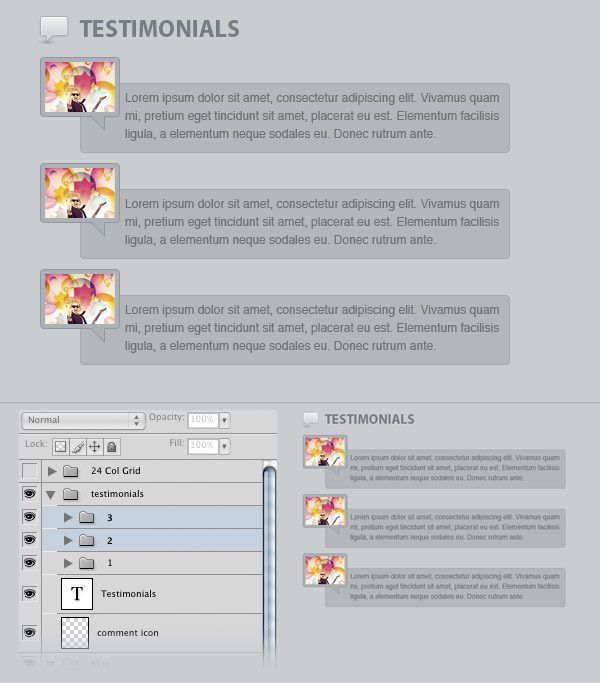
Step 33: Create the "Testimonials" Area
Create a new layer group and name it "testimonials". Then open the comment icon (from the icon set you downloaded) in Photoshop and move it into your main Photoshop document. Name this layer "comment icon" and make sure it’s aligned with the pencil icon and the screen icon. Select the Horizontal Type Tool (T) and write the word "Testimonials" next to the icon. I used the font Myriad Pro Bold and the color #777e84.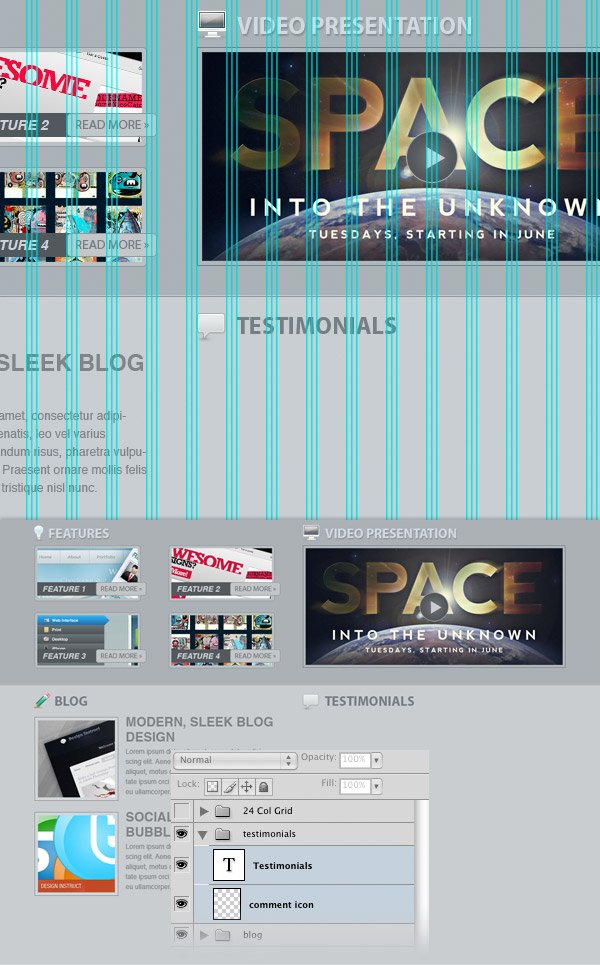
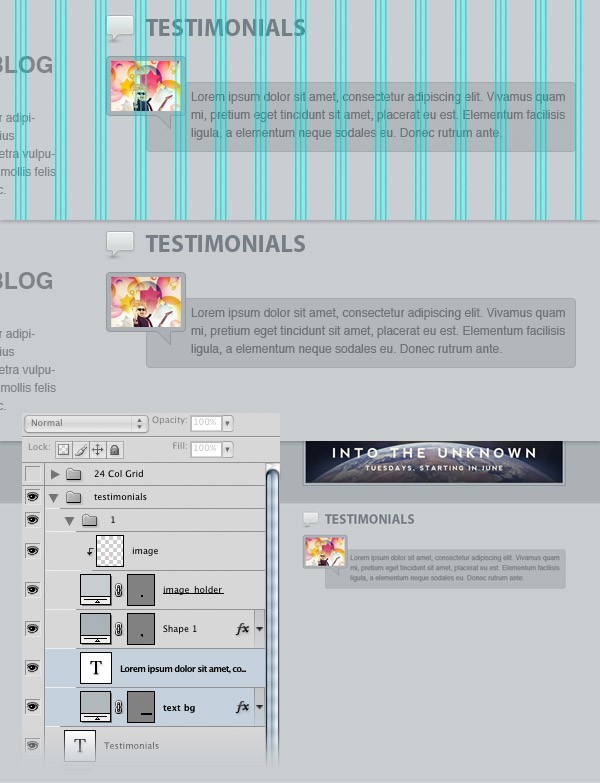
Select the Rectangle Tool (U), set the Radius to 4px and create a rectangle with the dimensions 80px by 60px and the color #abb1b5. Add a 1px inside stroke to this layer using the color #93989d.
Select the Pen Tool (P) and click on the Add to shape area button from the Options Bar above the image. Make sure that the vector mask of the rounded rectangle layer is active and use the Pen Tool (P) to add a small triangle in the bottom-right side of the rectangle.
Select the Rectangle Tool (U) and create a rectangle inside the comment icon. Name this layer "image_holder". Then open an image in Photoshop and move it into your main Photoshop document. Name this layer "image", put it above the "image_holder" layer, right-click on it and select Create Clipping Mask. Hold down the Ctrl/Cmd key, select all these layers and hit Ctrl/Cmd + G to group them. Name the group as "1".

Select the Rounded Rectangle Tool (U) and create a rounded rectangle with the dimensions 430px by 70px and the color #b2b7ba. Name this layer "text bg" and add a 1px inside stroke to it using the color #a4a9ac. Then put this layer underneath the comment icon layer. Activate the guides and make sure you align your layers as you see in the following image. Select the Horizontal Type Tool (T) and add some text inside the rounded rectangle you created. I used the font Helvetica Regular and the color #6f7274.
Create two more testimonials just like you created the first one.
Step 34: Create the Footer
Create a new layer group and name it "footer". Select the Rectangle Tool (U) and create a rectangle with the height 50px and the color #b0b5b8 at the bottom of your web layout.Select the Line Tool (U), set the Weight to 1px, hold down the Shift key and create a horizontal line at the top of the rectangle using the color #93999d. Name this layer "1px line" and duplicate it (Ctrl/Cmd + J). Then switch to the the Move Tool (V) and hit the Down Arrow key once to move this new layer one pixel down. Change the color of this new line to #c2c7ca.
Select the Horizontal Type Tool (T) and write a copyright statement in your footer. I used the font Helvetica Regular and the color #81878b.

Tutorial Summary
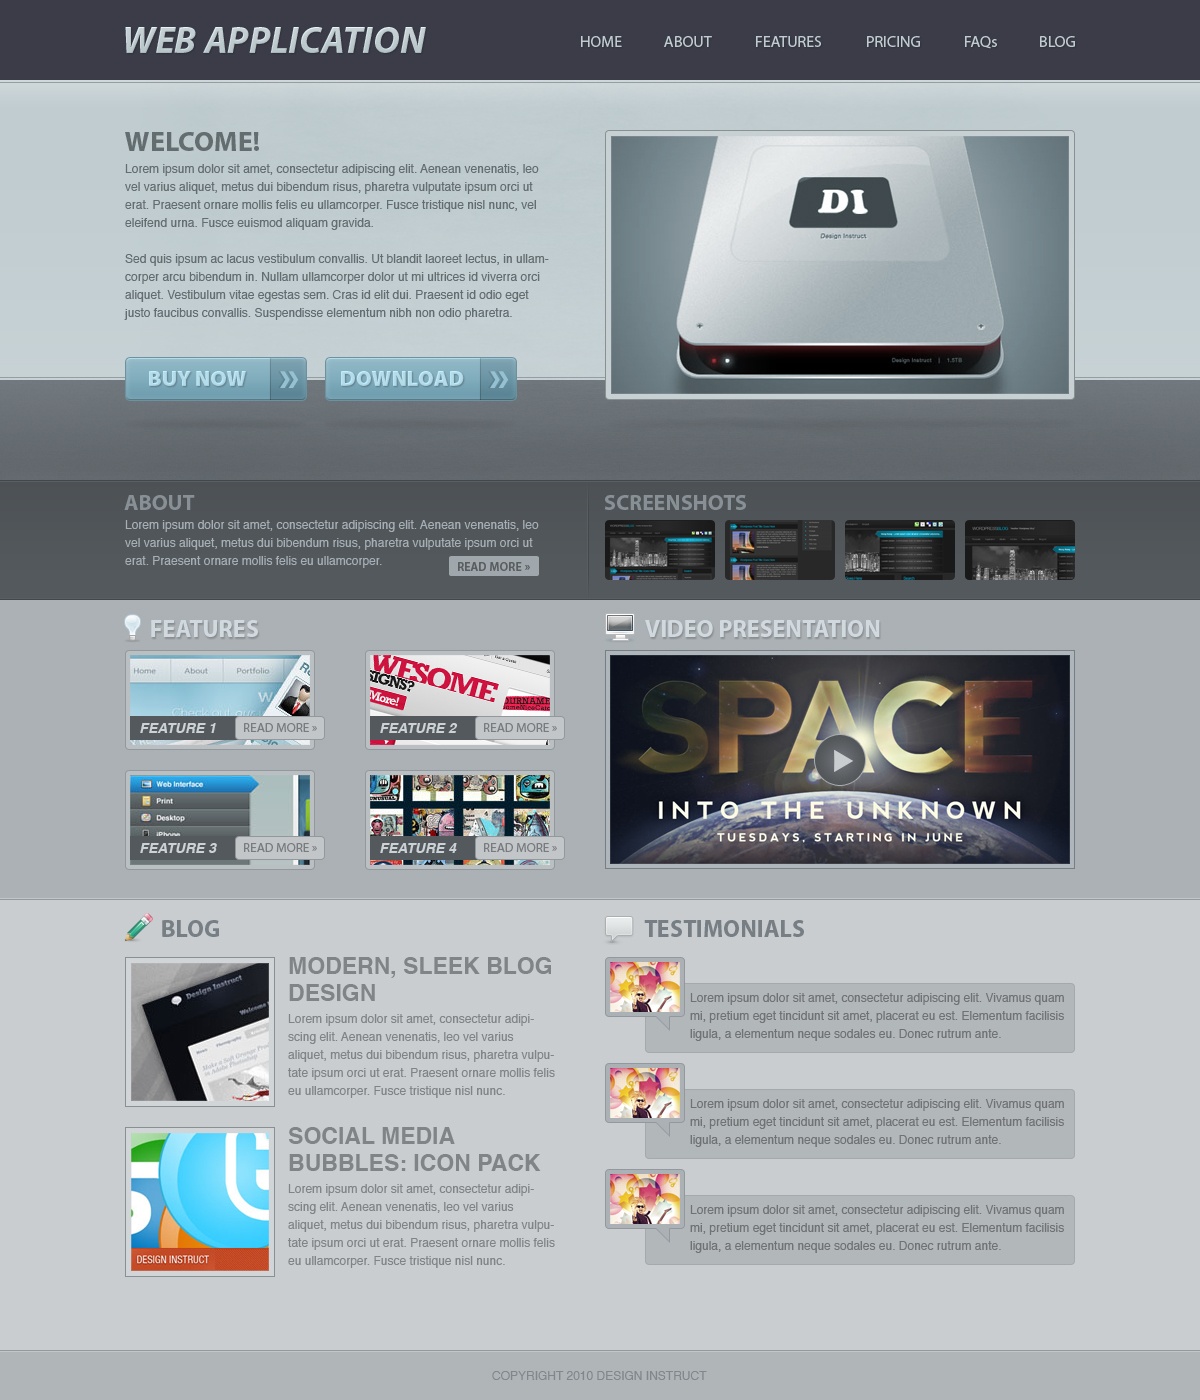
We have finished creating our web application layout! You can see the final image below. Click on it to see the full-size version. I hope you enjoyed this tutorial and I hope you learned a couple of new Photoshop web design techniques.Please share your thoughts and ideas in the comment section below — I look forward to reading them.
Download Source Files
- web_app_website (ZIP, 10.2 MB)


Tidak ada komentar:
Posting Komentar